Creating a Plan
Learn how to access and use the Zitcha Planning Engine to create plans, add ad sets, and start managing your retail media campaigns efficiently.
The Zitcha Planning Engine is your central workspace for planning, managing, and reporting on retail media activity.
This guide walks you through the basic setup and workflow to create your first plan, add ad sets, and prepare campaigns for approval.
Prerequisites
Before you begin, make sure you have:
- ✅ An authenticated Zitcha user account
- ✅ At least one assigned role and team within your organisation
- ✅ Access to a valid Wallet linked between your organisation and your advertiser
Need access? Contact your organisation’s administrator or refer to Identity and Access Management.
Accessing the Planning Engine
- Log in to your Zitcha account.
- From the left-hand menu, select Planning or at the top right you can select View Plans
- You’ll see a list of existing Plans. If this is your first time, the list may be empty.
- Click + New Plan to begin.
Creating a Plan
Plans provide the framework for organising and tracking your campaigns.
Each plan may represent an individual campaign or a long-term JBP (Joint Business Plan).
To create a new plan:
- Click + New Plan.
- Enter the following fields:
- Plan Name – a clear, descriptive label (e.g., “Q3 Awareness Campaign”).
- Advertiser – select from your linked organisations.
- Wallet – choose a shared wallet to fund the plan.
- (Optional) Add attachments for internal visibility.
- Click Create Plan.
Note: Plans can exist without ad sets. You can create ad sets later as you confirm details with advertisers.
Adding Ad Sets
Ad sets group related ads with shared parameters such as schedule, placement, and media type.
To create an ad set within your plan:
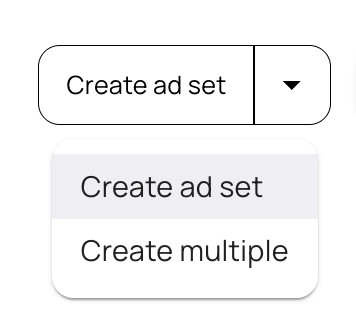
- Open your plan and select Create Ad Set or Create multiple
- Complete the key configuration fields:
- Ad Set Title - choose a title for this specific ad set.
- Media Type - choose the ad type (e.g., banner, sponsored product, digital screen).
- Placement - where the ad will appear.
- Schedule - define the start and end dates.
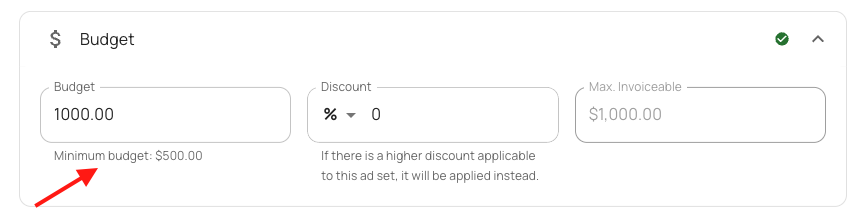
- Budget - assign funds from your selected wallet.
- Click Save Draft to save progress, or Submit for Approval if the ad set is ready.
You can add multiple ad sets within a single plan to manage multiple channels or time periods.
Adding Ads
Ads represent the creative executions within an ad set.
Each ad inherits the ad set’s properties (media type, schedule, and placement) but can include unique creative assets.
To add an ad:
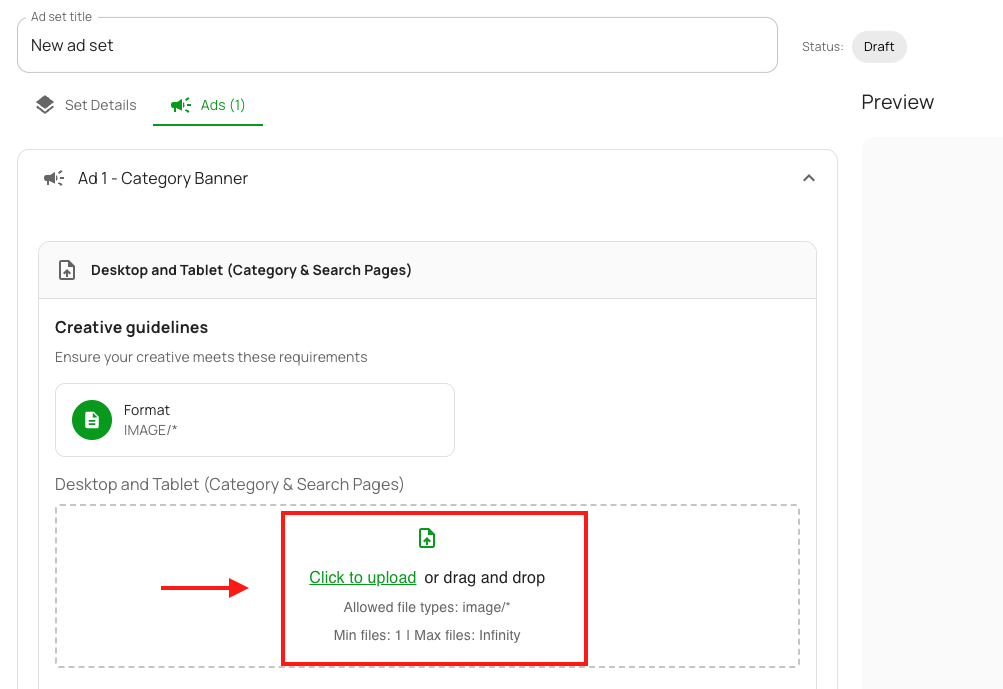
- Open your ad set.
- Click + Create Ad.

- Upload creative assets or link product SKUs.
- Provide required metadata (e.g., title, URL, text fields).
- Click Save Ad Set.
Submitting for Approval
Once your ad sets and ads are ready, you can submit them for network approval.
- Review your plan summary.
- Ensure all ad sets meet minimum delivery requirements.
- Check the creative guidelines in the uploader fields.
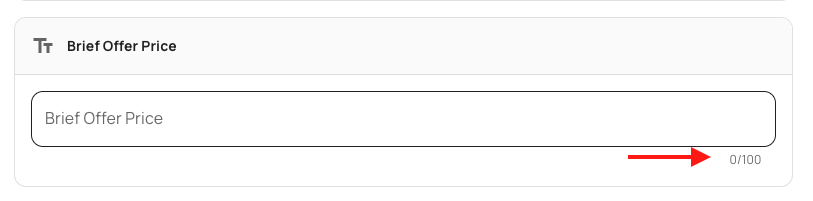
- Check character limits on text inputs
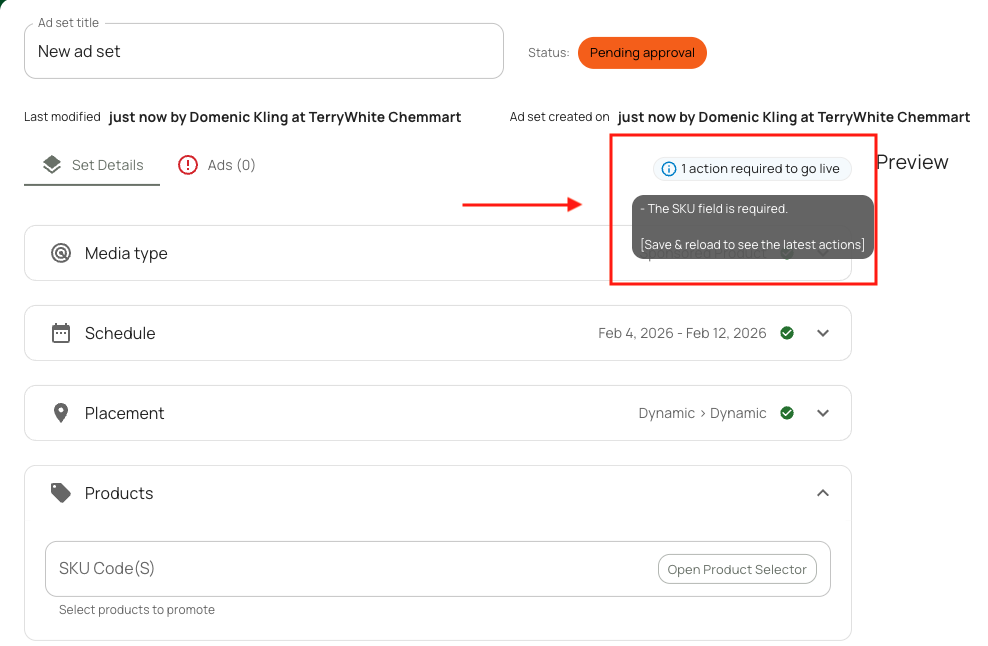
- Check 'Required to Go Live' flags
- Check minimum bid validation for CPC & CPM.
- Click Propose. You can Propose a specific ad set or you can Propose plan


After submission:
- The ad set state changes to Pending Approval.
- Network users are notified and can approve, reject, or request changes.
You’ll receive notifications in-app (and via email if enabled) when the status updates.
Understanding Statuses
| Status | Description |
|---|---|
| Draft | Created but not yet submitted. |
| Pending Approval | Needs approval. May have missing information/ |
| Reserved | Inventory is held. You still have required steps to finish before scheduling. |
| Scheduled | Ready to run. All required steps are complete. |
| Live | Ads are live and running. |
| Ended | Ads ran for less than the scheduled timeframe due to manual intervention |
| Delivered | Completed delivery. Ads ran for the scheduled timeframe. |
See Ad Set States for the full lifecycle.
Pro Tips
💡 Save early and often – Drafts auto-save, but always confirm changes before navigating away.
💡 Clone successful setups – Save time by duplicating past plans or ad sets as templates.
💡 Use filters – The Planning view includes filters by advertiser, status, and schedule for quick navigation.
💡 Validate wallets – Make sure the wallet linked to your advertiser has a sufficient balance before creating new plans.
Updated about 15 hours ago